Deployment
Vercel
Click the button below to start deployment.
![]()
After the code is cloned to your own GitHub by default, you need to fill in the environment variables:
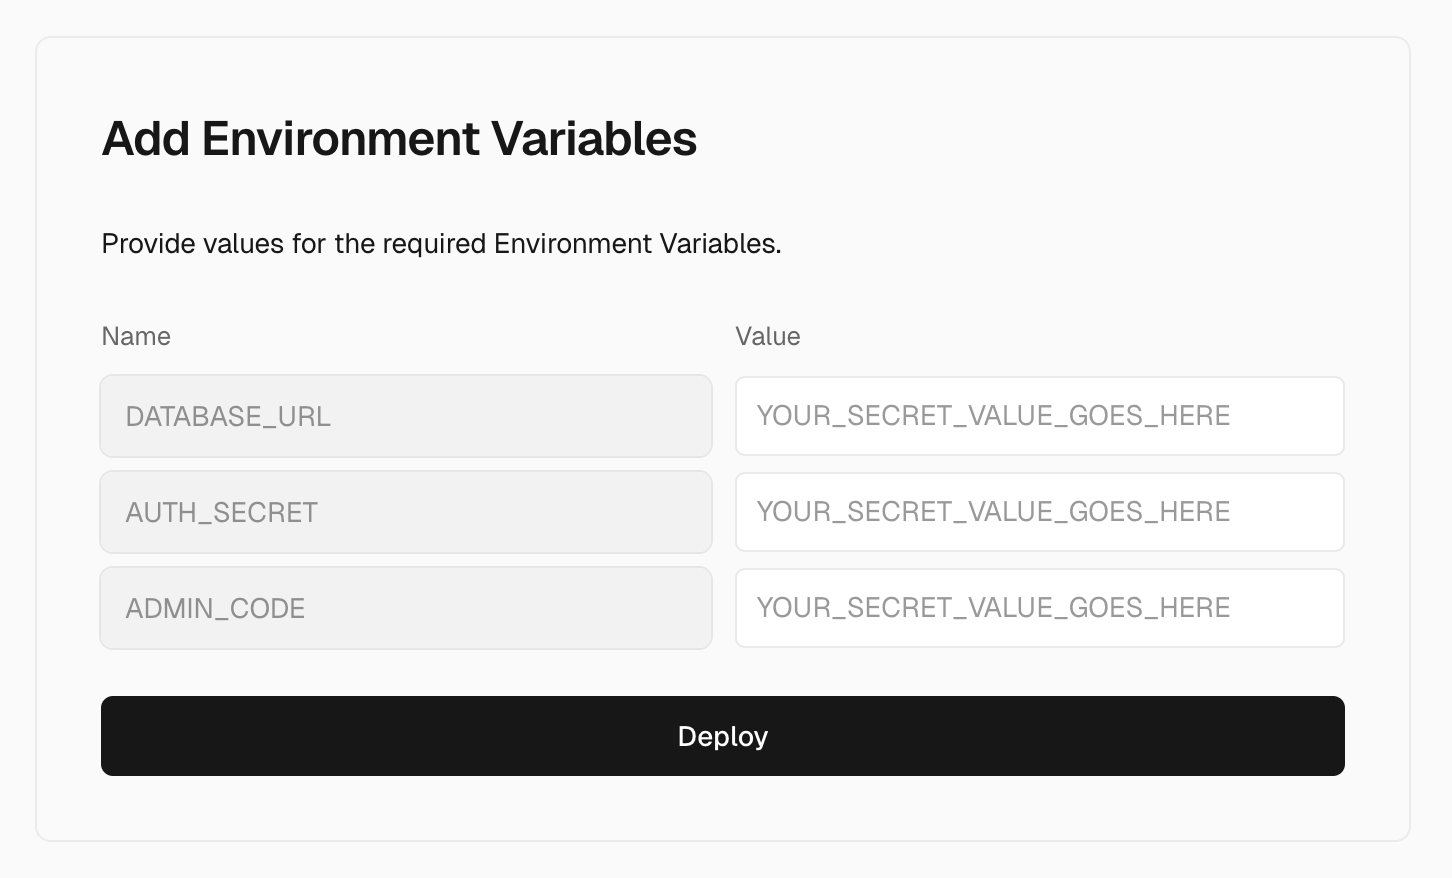
# PostgreSQL database connection URL, Vercel platform provides free hosting service, see details below
DATABASE_URL=postgres://postgres:password@localhost/hivechat

# Used for encrypting sensitive information such as user data. You can use openssl rand -base64 32 to generate a random 32-character string as the key. This is an example, please replace with your own generated value.
AUTH_SECRET=hclqD3nBpMphLevxGWsUnGU6BaEa2TjrCQ77weOVpPg=

# Administrator authorization code. After initialization, use this value to set up the administrator account. This is an example, please replace with your own generated value.
ADMIN_CODE=22113344

# Set to the official domain in production environment, used for callbacks when enabling third-party logins like Feishu
# For first time, you can use `https://your-project-name.vercel.app`
NEXTAUTH_URL=https://hivechat-xxx.vercel.app

# Whether to enable email login, set to ON to enable, OFF to disable
EMAIL_AUTH_STATUS=ON

# Whether to enable Feishu login, set to ON to enable, OFF to disable
FEISHU_AUTH_STATUS=OFF
FEISHU_CLIENT_ID="cli_xxxxxxxxxxxxxxxx"
FEISHU_CLIENT_SECRET="xxxxxxxxHOEWIoE7eDc1Lhc0042OXXXX"

# Whether to enable WeChat Work login, set to ON to enable, OFF to disable
WECOM_AUTH_STATUS=OFF
WECOM_CLIENT_ID="ww728c371c2fXXXXXX"
WECOM_AGENT_ID="100XXXX"
WECOM_CLIENT_SECRET="H-7J4jzG0m1axpXLGshaCDlMOZxdjvkX6bIVLuXXXXXX"

# Whether to enable DingTalk login, set to ON to enable, OFF to disable
DINGDING_AUTH_STATUS=OFF
DINGDING_CLIENT_ID="dingpcfi2kpuplXXXXXX"
DINGDING_CLIENT_SECRET="3vk9-VFCExNckqNUk_CL2F-HEgz7qGN-BimH0lZ1gUx6hWO7g_an2lnkk6XXXXXX"
Appendix: Vercel (Neon) PostgreSQL Configuration
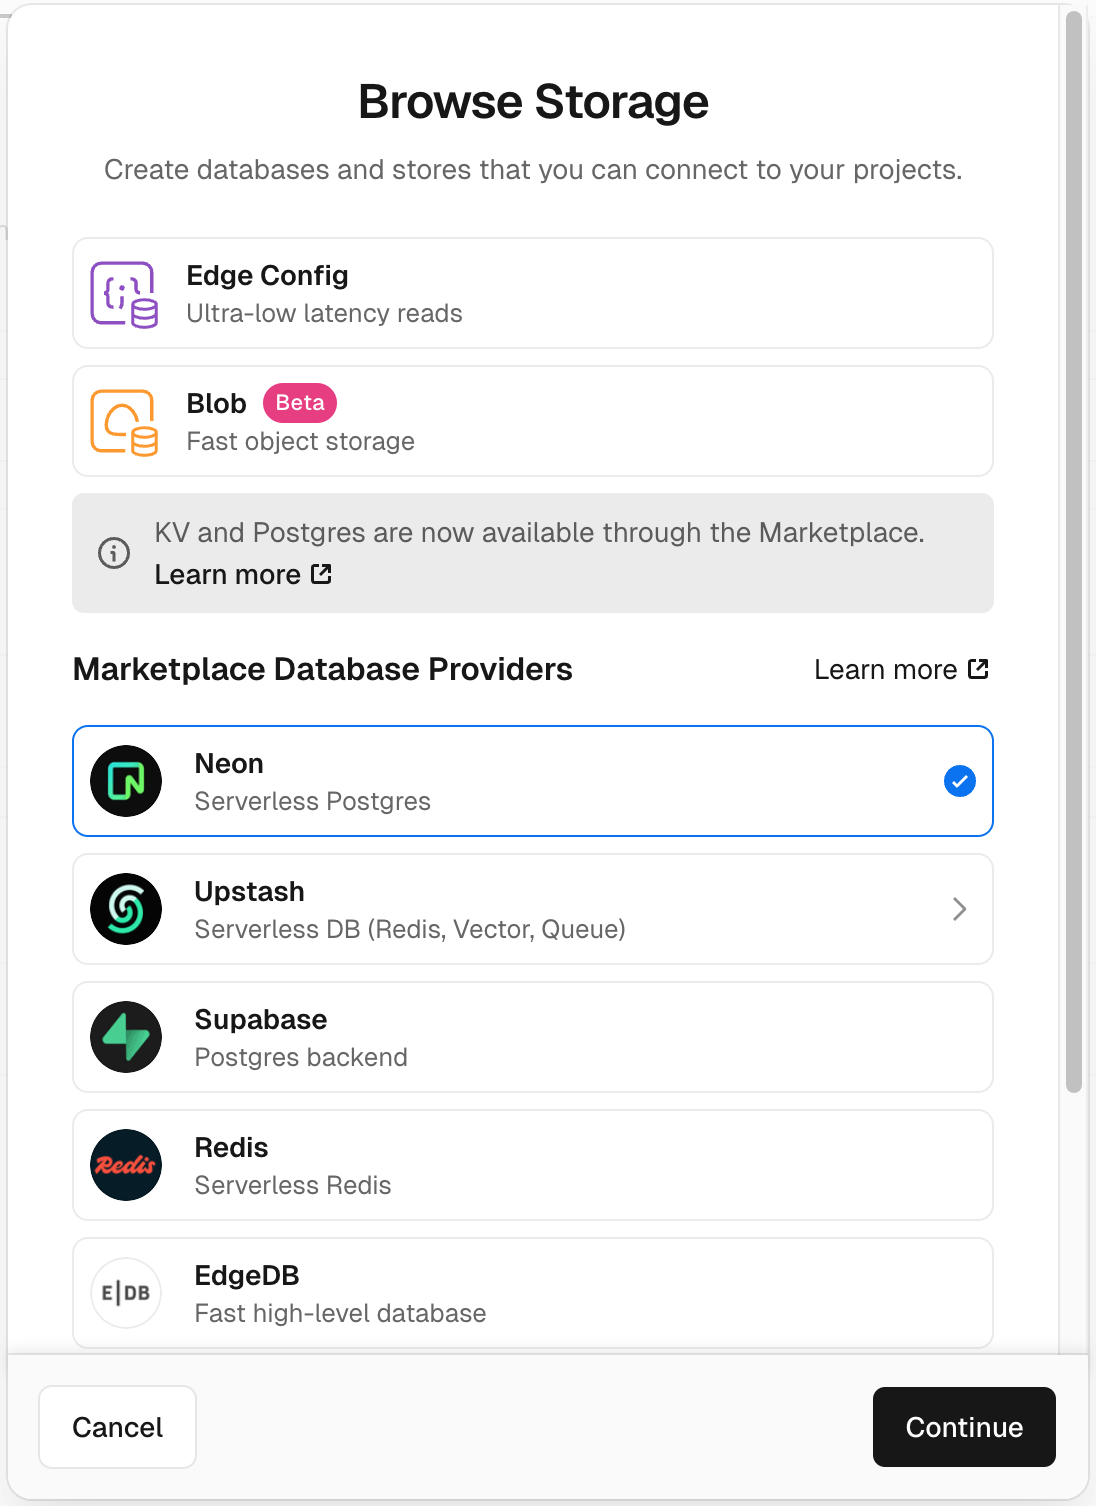
- In the Vercel platform top navigation, select the "Storage" tab and click Create Database
- Select Neon (Serverless Postgres)
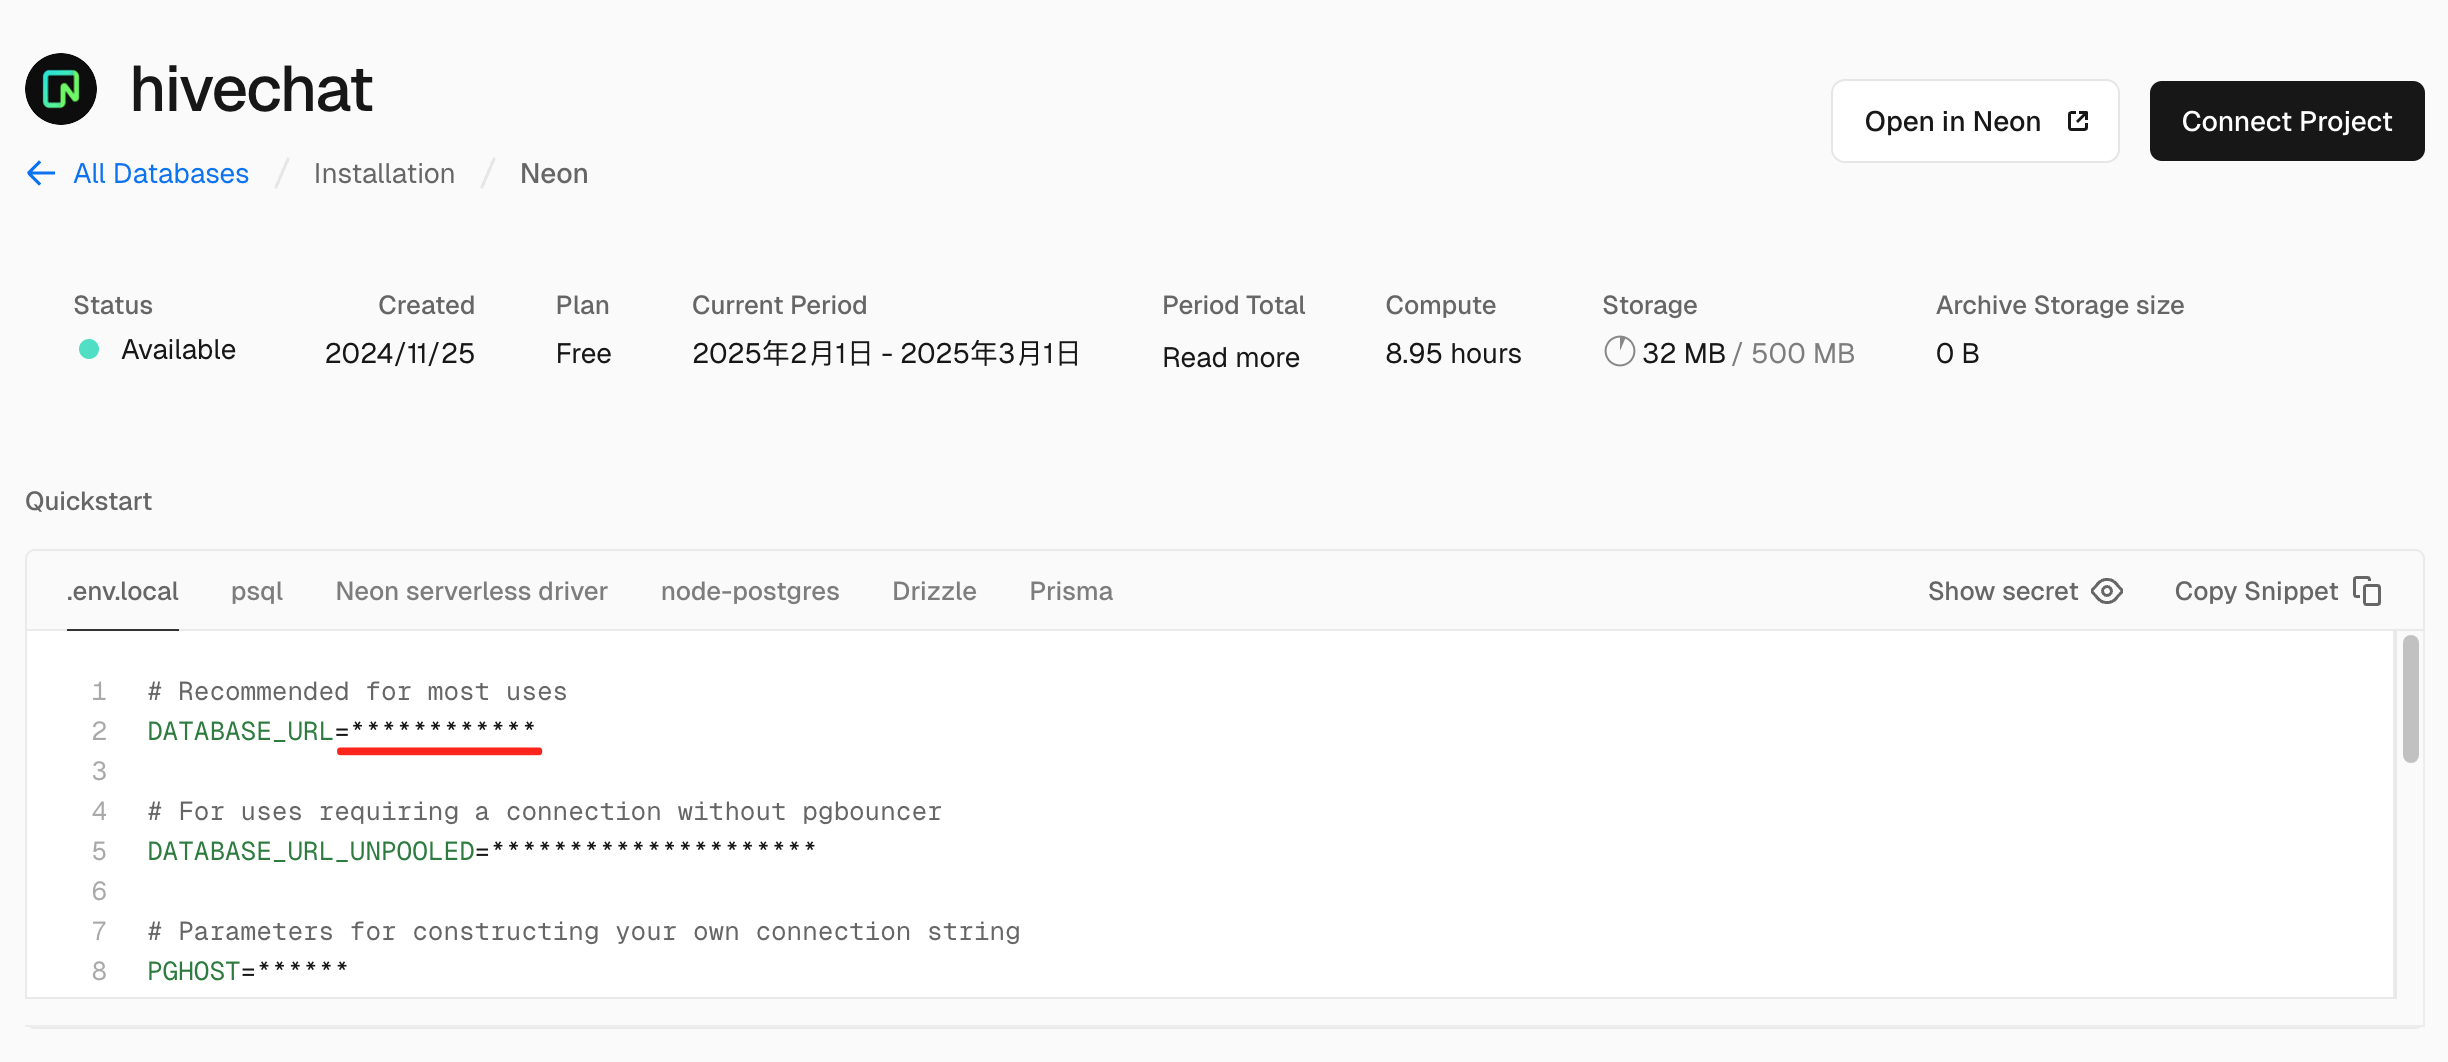
- After completing the creation according to the guide, copy the
DATABASE_URLvalue here and fill it into theDATABASE_URLin the previous step
- Initialize administrator account
After installation and deployment according to the above method, visit http://localhost:3000/setup (actual domain and port number), you can enter the administrator account setup page. After setup is complete, you can use the system normally.